Grinding Machine Tending Automation: Which Parts, Cycle Times, and Robot Setups Make Sense?
Publication Date
author
Grinding Machine Tending Automation: Which Parts, Cycle Times, and Robot Setups Make Sense?
Grinding machine tending automation only works when part design, takt time, and loading method fit the process, not just the sales pitch.
That is the practical starting point for any grinding machine tending automation decision.
In real plants, the best results come from matching automation to stable part families, repeatable machine cycles, and manageable changeover rules.
If one of those conditions is missing, grinding machine tending automation often adds complexity before it adds output.
For TechStat Vanguard, the useful question is never whether robots are modern. It is whether the numbers close under production conditions.
This guide focuses on that engineering reality: part suitability, cycle time thresholds, and robot setups that make operational sense.
Which Parts Fit Grinding Machine Tending Automation Best?
Not every workpiece is a strong candidate for grinding machine tending automation.
The strongest candidates usually share three traits: predictable geometry, repeatable orientation, and low handling sensitivity after grinding or before regrinding.
Good examples include bearing races, brake components, shafts, seal rings, gear blanks, bushings, and medium-volume tool steel parts.
These parts usually present clear gripping surfaces and consistent loading references.
They also tolerate simple infeed and outfeed structures such as trays, pallets, conveyors, or dial tables.
By contrast, thin-wall parts, oily castings with irregular flash, and components with unstable center of gravity can complicate grinding machine tending automation quickly.
The issue is not only gripping. It is orientation repeatability at the machine door.
A robot can place a part consistently, but the upstream presentation still has to be controlled.
Part Features That Usually Support Automation
- Stable outside diameter or flat gripping area
- Single clear datum for machine loading
- Low burr variation and limited chip carryover
- Manageable coolant residue during transfer
- Enough batch size to reduce frequent retooling
Warning Signs Before You Automate
- Part families that need many grippers and jaws
- Manual deburring between cycles
- Frequent wheel dressing interruptions with no robot handshake logic
- Loose machine guarding or awkward access points
- Quality checks that still depend on operator feel
From a project standpoint, part standardization often creates more value than adding a larger robot.
That is a recurring pattern in grinding machine tending automation programs that actually scale.
What Cycle Times Make Grinding Machine Tending Automation Pay Back?
Cycle time is where many grinding machine tending automation plans either become bankable or collapse.
A robot cell needs enough machine time to absorb loading, unloading, part confirmation, door signals, and occasional recovery moves.
If the grinding cycle is very short, the robot becomes the bottleneck unless the layout is extremely optimized.
As a rule, grinding machine tending automation gets easier to justify once machine cycles move beyond roughly 25 to 35 seconds.
The economics improve further when cycles are 45 seconds or longer and part flow is steady across multiple shifts.
That does not mean shorter cycles are impossible. It means the integration burden rises fast.
A Practical Way to Read Takt Time
For a single grinding machine, compare machine cycle time with the robot service window.
That service window includes pick, place, confirmation, door open, door close, and repositioning.
If robot service consumes too much of the machine cycle, spindle utilization drops.
That is why some grinding machine tending automation cells serve two machines with staggered cycles instead of one fast machine.
The real calculation should also include scrap risk, labor coverage, changeover loss, and machine idle events during dressing or gauging.
That wider view is where many grinding machine tending automation projects gain or lose credibility.
Which Robot Setups Make Sense for Grinding Machine Tending Automation?
Robot selection should follow payload, reach, machine access, and environmental exposure.
It should not start from brand preference.
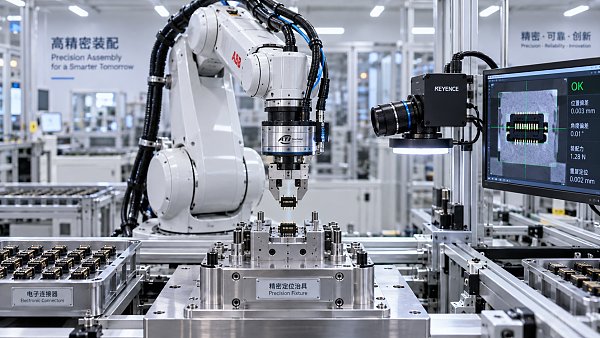
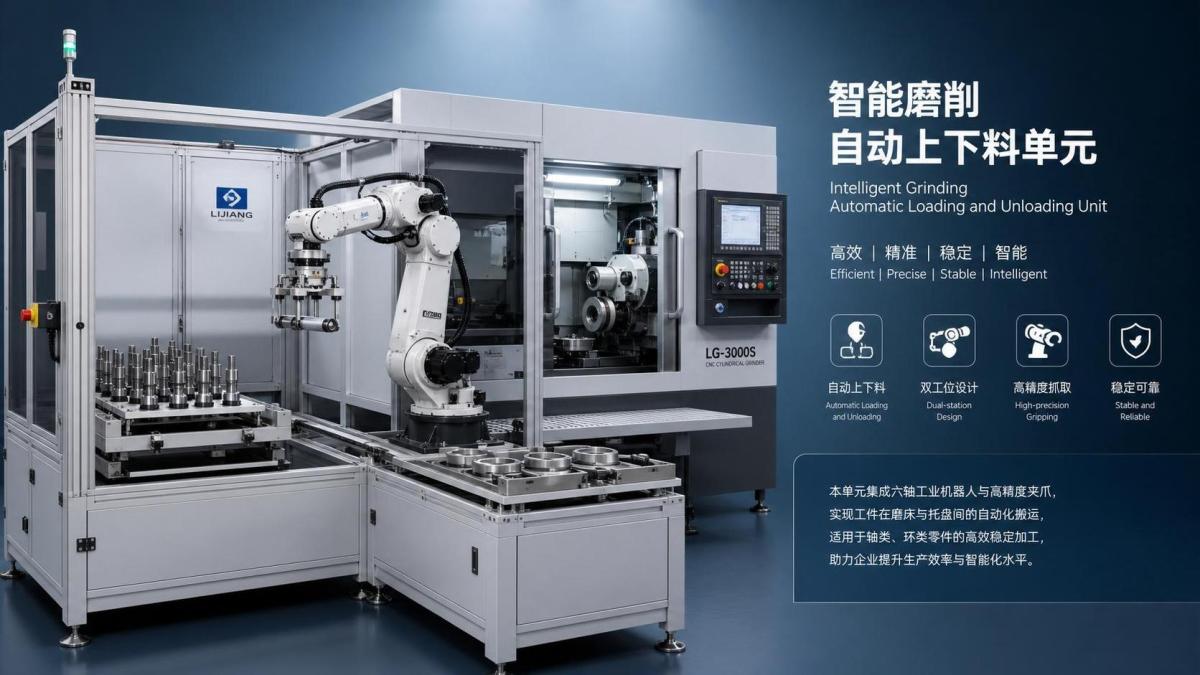
Most grinding machine tending automation cells use compact six-axis robots because they handle angled access and door-side loading well.
For simple vertical loading, gantry or cartesian systems can still be effective, especially in repetitive high-volume lines.
Cobots can work, but only when guarding, speed limits, and throughput expectations are aligned.
In many grinding machine tending automation cases, a traditional industrial robot remains the more robust answer.
Common Setup Patterns
- Single robot to one grinder for moderate volume and flexible part families
- Single robot to two grinders with offset cycles for better robot utilization
- Robot plus vision for random bin or tray orientation correction
- Robot with in-process blowoff or wash step before gauging or next operation
Gripper Choices Matter More Than Many Teams Expect
The gripper often determines whether grinding machine tending automation feels stable or fragile in daily production.
Parallel jaws work well for shafts and rings with defined features.
Three-jaw centric gripping can improve balance for round parts.
Magnetic gripping helps on ferrous components, but coolant and fine swarf need careful control.
Vacuum is usually less common unless the parts are flat, clean, and light.
Dual grippers are valuable when the machine cycle is tight because they reduce empty travel between raw and finished part handling.
Key Risks in Grinding Machine Tending Automation and How to Control Them
The biggest mistake is treating grinding machine tending automation as a simple pick-and-place application.
Grinding brings coolant, abrasive dust, wheel wear, and quality sensitivity into the same cell.
Those factors change design priorities.
Main Failure Points to Address Early
- Part seating errors caused by dirty locating surfaces
- Gripper wear from abrasive contamination
- Machine wait states during dressing or gauging cycles
- Inconsistent upstream part presentation
- Overly ambitious multi-part changeovers without standardization
A more durable grinding machine tending automation cell usually includes air blowoff, part presence checks, and clear fault recovery routines.
Some lines also need probing, gauging, or barcode traceability before parts move downstream.
That added logic increases upfront scope, but it often prevents unstable output later.
This is exactly where TSV’s data-first view matters: automation value depends on measured uptime, not presentation slides.
A Practical Decision Framework for Grinding Machine Tending Automation
A grounded decision process keeps grinding machine tending automation tied to production reality.
Start with the part family, then the cycle profile, then the robot concept.
That order matters.
- Map the top recurring part numbers by annual volume and handling similarity.
- Measure true machine cycle time, including dressing, gauging, and idle losses.
- Check whether one gripper family can cover most parts without unstable compromises.
- Decide whether one robot should serve one machine or a paired machine layout.
- Model fault recovery, not just normal cycle flow.
- Pilot the cell on the most repeatable part family first.
When these six steps are done honestly, grinding machine tending automation becomes easier to scope, quote, and defend internally.
It also becomes clearer when not to automate yet.
That restraint is often the difference between a useful cell and an expensive workaround.
The most effective grinding machine tending automation projects are rarely the most complicated ones.
They are the ones where part geometry, cycle timing, and robot setup are engineered around facts.
For teams comparing options, that is the practical standard worth using before any capital decision moves forward.
Search News
Hot Articles
- Carbon Fiber StructuresHow to Specify Aerospace Carbon Fiber Assemblies for Lightweight, Load-Bearing PartsJul 11, 2026
- Machine VisionXiaomi, Alibaba DAMO Academy Drive Open-Source Robotics Model Ecosystem, Lowering Algorithm Development Barriers for Overseas SMEs Adopting Chinese Robotics SolutionsMar 30, 2026
- Cobots & ArmsShanxi 'AI+' Conference Showcases Embodied Intelligence with Multinational Buyer Engagement: Key Industry ImplicationsMar 30, 2026
Popular Tags
Recommended News
 Jul 11, 2026How to Specify Aerospace Carbon Fiber Assemblies for Lightweight, Load-Bearing PartsAerospace carbon fiber assemblies: learn how to specify laminate design, load data, joining methods, and inspection controls for lighter, reliable load-bearing aerospace parts.Elena Rostova (UAV Systems Researcher)
 Mar 30, 2026Xiaomi, Alibaba DAMO Academy Drive Open-Source Robotics Model Ecosystem, Lowering Algorithm Development Barriers for Overseas SMEs Adopting Chinese Robotics SolutionsXiaomi & Alibaba DAMO Academy's open-source robotics models lower algorithm barriers for global SMEs. Boost efficiency in manufacturing, logistics & smart retail with ROS 2 compatible solutions.TSV Data Lab
 Mar 30, 2026Shanxi 'AI+' Conference Showcases Embodied Intelligence with Multinational Buyer Engagement: Key Industry ImplicationsShanxi 'AI+' Conference highlights embodied intelligence with Tesla, Ubtech & Jiantao showcasing multimodal robotics. 40+ global buyers validated tech on-site, creating new B2B channels for industrial automation & AI solutions.Chen Wei (Automation Lead Engineer)
 Mar 30, 2026Zhongguancun Unveils 6G Integrated Sensing-Computing-Intelligence Platform to Empower Embodied Robots for Global Industrial ApplicationsZhongguancun's new 6G platform revolutionizes industrial robotics with <10ms latency, empowering global automotive, logistics & port automation. Discover how this tech boosts China's smart manufacturing exports.TSV Data Lab
 Mar 30, 2026Mech-Mind Tianjin Embodied Intelligence R&D and Production Base Goes Live, Cutting Delivery Time by 20%–30% for Global Customized AMR+Vision SolutionsMech-Mind's Tianjin AMR+Vision production base cuts delivery time by 20%-30% for欧美 & Latin American markets. Discover how this PLd-certified facility accelerates customized robotics solutions for smart manufacturing and logistics.Chen Wei (Automation Lead Engineer)
 Mar 30, 2026Boao Forum Reveals 'Co-evolution of Big and Small Brains' Trend in Humanoid Robots, China's Embodied Intelligence Accelerates Adaptation to Overseas Manufacturing Service ScenariosDiscover how China's humanoid robots, featuring 'Co-evolution of Big and Small Brains,' are revolutionizing global manufacturing. Learn about Embodied Tian Gong 3.0's ISO compliance and overseas deployment at Boao Forum 2026.Chen Wei (Automation Lead Engineer)
 Mar 30, 2026China Railway Industrial Secures Patent for Embodied Robotics in Material Handling, Boosting High-Precision Delivery Capabilities for Overseas Infrastructure and Manufacturing ProjectsChina Railway Industrial's new patent for embodied robotics in material handling boosts high-precision delivery for global infrastructure & manufacturing. Discover how this innovation enhances logistics accuracy in automotive, rail transit & EPC projects.Chen Wei (Automation Lead Engineer)
 Oct 04, 2026CAD/CAM Benchmarking in the GCC: What Manufacturers Should Ask a ConsultantCAD CAM benchmark consultant GCC guide: learn the key questions manufacturers should ask to validate post-processors, workflows, machine performance, and production risk.Victor Lin (Chief Software Architect)
 Oct 03, 2026Selecting Automotive Radar Sensor Modules for ADAS Range, Resolution, and IntegrationAutomotive radar sensor module selection guide for ADAS: compare range, resolution, field of view, latency, and integration to build safer, reliable vehicle systems.TSV Data Lab
 Oct 02, 2026How to Qualify Machined Parts Suppliers for Hard Tech ProgramsHard tech supply chain machined parts demand rigorous supplier qualification. Learn how to assess capability, traceability, quality controls, and delivery resilience.Dr. Marcus Vance
 Oct 01, 2026How to Select an Outdoor Security Radar Sensor for Perimeter Detection?Outdoor security radar sensor selection guide: compare range, accuracy, false-alarm control, integration, and field testing for reliable perimeter detection.TSV Data Lab
 Sep 30, 2026How to Evaluate Solid-State LiDAR Hardware for Outdoor Autonomous VehiclesSolid state LiDAR hardware evaluation guide for outdoor autonomous vehicles—compare range, point-cloud quality, environmental resilience, integration, and safety.TSV Data Lab
 Sep 29, 2026ISO 9283 Repeatability: How to Evaluate Cobot Positioning PerformanceISO 9283 cobot repeatability explained: learn how payload, reach, approach direction, and test conditions affect positioning performance and cell capability.Chen Wei (Automation Lead Engineer)
 Oct 04, 2026How Should You Compare 5-Axis CNC Machine Accuracy Claims?How do I compare 5-axis CNC machine accuracy claims? Learn how to assess standards, thermal stability, TCP accuracy, and real-world test evidence.Dr. Marcus Vance
 Oct 03, 2026Is Edge Computing Necessary for Real-Time Quality Inspection?Is industrial edge computing necessary for real-time quality inspection? Explore how latency, data volume, reliability, and control integration shape the right architecture.TSV Data Lab
 Oct 02, 2026What Documents Prove a Precision Machining Supplier Can Hold Tolerance?What documents prove a precision machining supplier can hold tolerance? Explore certificates, FAI reports, calibration, SPC, and traceability evidence to qualify suppliers with confidence.Dr. Marcus Vance
 Oct 01, 2026Can a Machining Supplier Meet Aerospace Fatigue Testing Requirements?Can a machining supplier meet aerospace fatigue testing requirements? Learn the traceability, process control, and test evidence needed for reliable aerospace parts.Dr. Marcus Vance
 Sep 30, 2026Which Industrial Robot Specifications Matter for High-Precision Assembly?Which industrial robot specifications matter most for high-precision assembly? Explore repeatability, accuracy, stiffness, vibration, calibration, and force control for reliable yields.Chen Wei (Automation Lead Engineer)
 Sep 29, 2026How Do You Verify Servo Motor Torque Under Continuous Load?How do I verify servo motor torque under continuous load? Learn RMS torque checks, torque-speed limits, thermal derating, and real-machine testing.Chen Wei (Automation Lead Engineer)
 Oct 02, 2026ZD330 Software Configuration: Verifying Cut-List Import Before PurchaseZD330 software and machine configuration: verify cut-list imports, data mapping, labels, and workflow before purchase to reduce errors and choose with confidence.Victor Lin (Chief Software Architect)
 Sep 28, 2026Spindle Runout Measurement in Germany: DIN Standards, Methods, and Acceptance LimitsSpindle runout measurement Germany: explore DIN standards, proven methods, acceptance limits, and audit-ready practices for reliable machining quality.Dr. Marcus Vance
 Sep 27, 2026How to Select Wall-Mount Edge Devices for Space-Constrained Factory NetworksWall mount edge devices for space-constrained factories: evaluate workload, thermal design, power resilience, cable access, and network reliability for smarter deployments.TSV Data Lab
 Sep 26, 2026Machining Tolerance Analysis: How to Set Limits That Meet Function and Cost TargetsMachining tolerance analysis: learn how to set functional limits, control tolerance stacks, reduce inspection risk, and balance precision with production cost.Dr. Marcus Vance
 Sep 25, 2026How to Evaluate an Industrial Infrastructure Data Platform for Multi-Site OperationsIndustrial infrastructure data platform evaluation guide for multi-site operations: compare data quality, edge resilience, interoperability, governance, and scalable proof-of-value criteria.Victor Lin (Chief Software Architect)